We're thrilled to kick off the year by blending art, fashion, and intensive technology. Painting on the web with the KidSuper team brings fun challenges. Let's tackle them!
Just doing what we love and getting recognition on platforms like Awwwards, The FWA and Landing Love, feels like we've aced the year already. Just kiddin', we're wondering what's next and writing some lines for the curious who got intrigued about the kidsuper.world.
This project offers a 3D immersive journey, allowing you to explore the KidSuper shop through engaging interactions with paintings and portals. The experience starts with a painting that vividly portrays the outdoors of their Brooklyn-based store. This is followed by a photo-realistic representation of the store's interior. Once inside, you're free to delve into various elements, from playing tunes on the Winco to admiring the captivating 'La Casa' animated artwork.
Now, let's get behind the scenes!
Unveiling the store with shaders
We wanted to enhance the feeling that you are inside a painted world. So, we created a reveal effect that allows the user to "paint" the scene with their mouse, gradually uncovering the building’s surroundings.
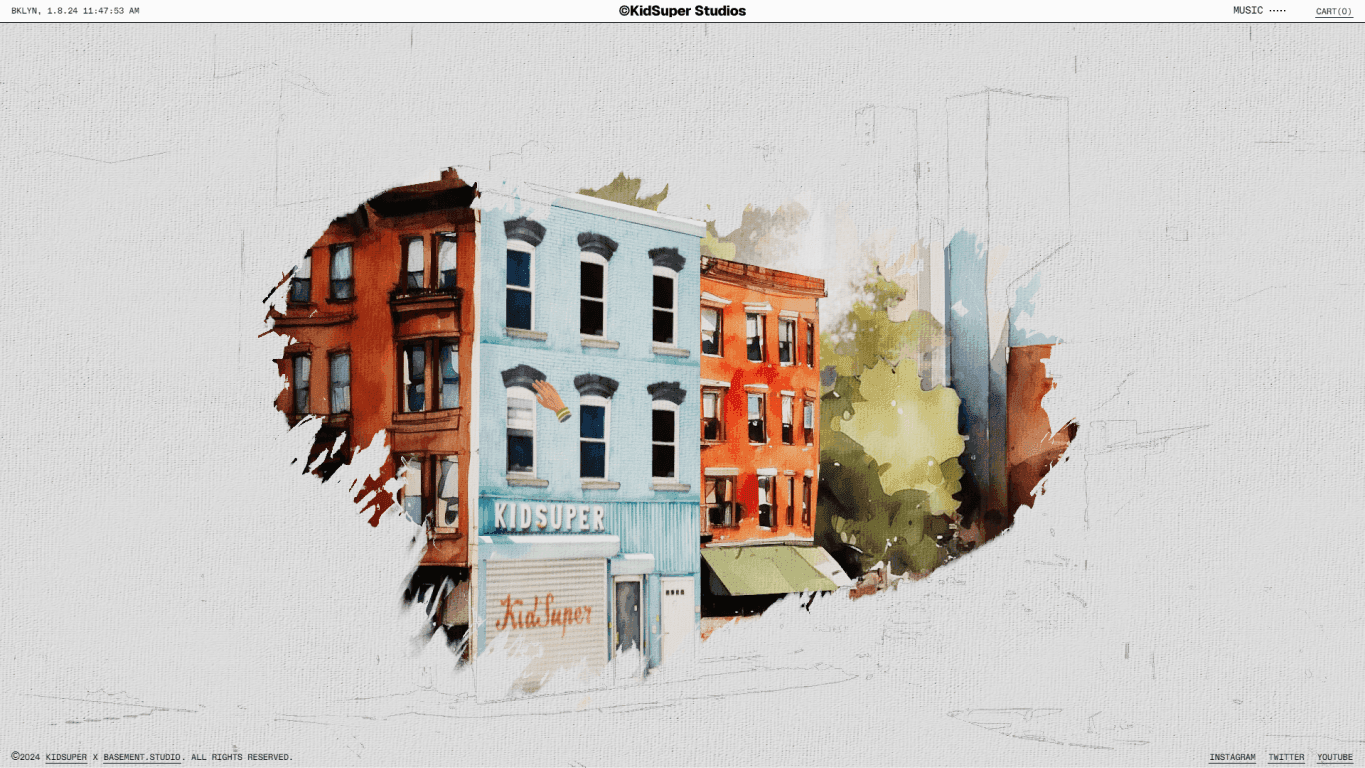
To achieve this effect, we must first render and save the scene as a texture. Then, we mix two images to get the result. The first one is a pencil-drawn version of the render, created by detecting edges in the rendered texture - something like a contour sketch of the artwork.
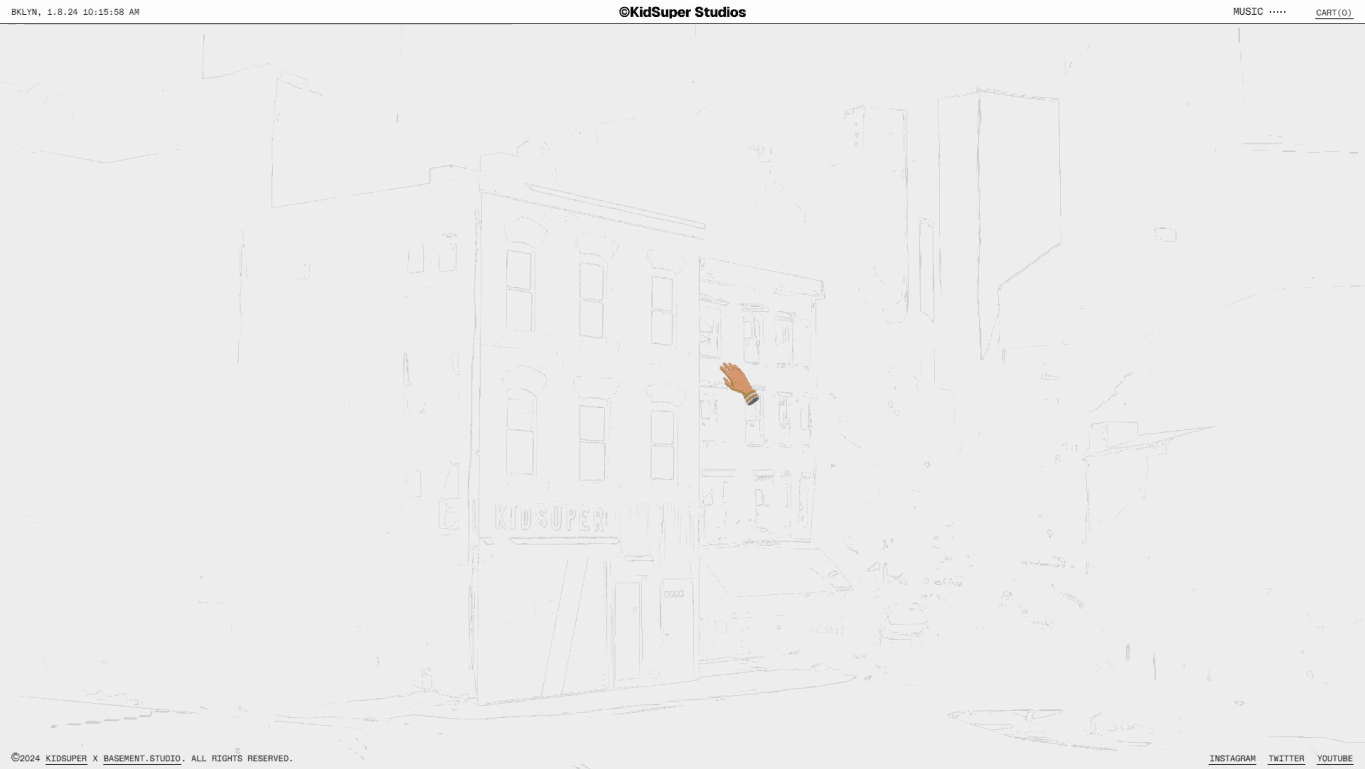
The second one is the rendered scene.
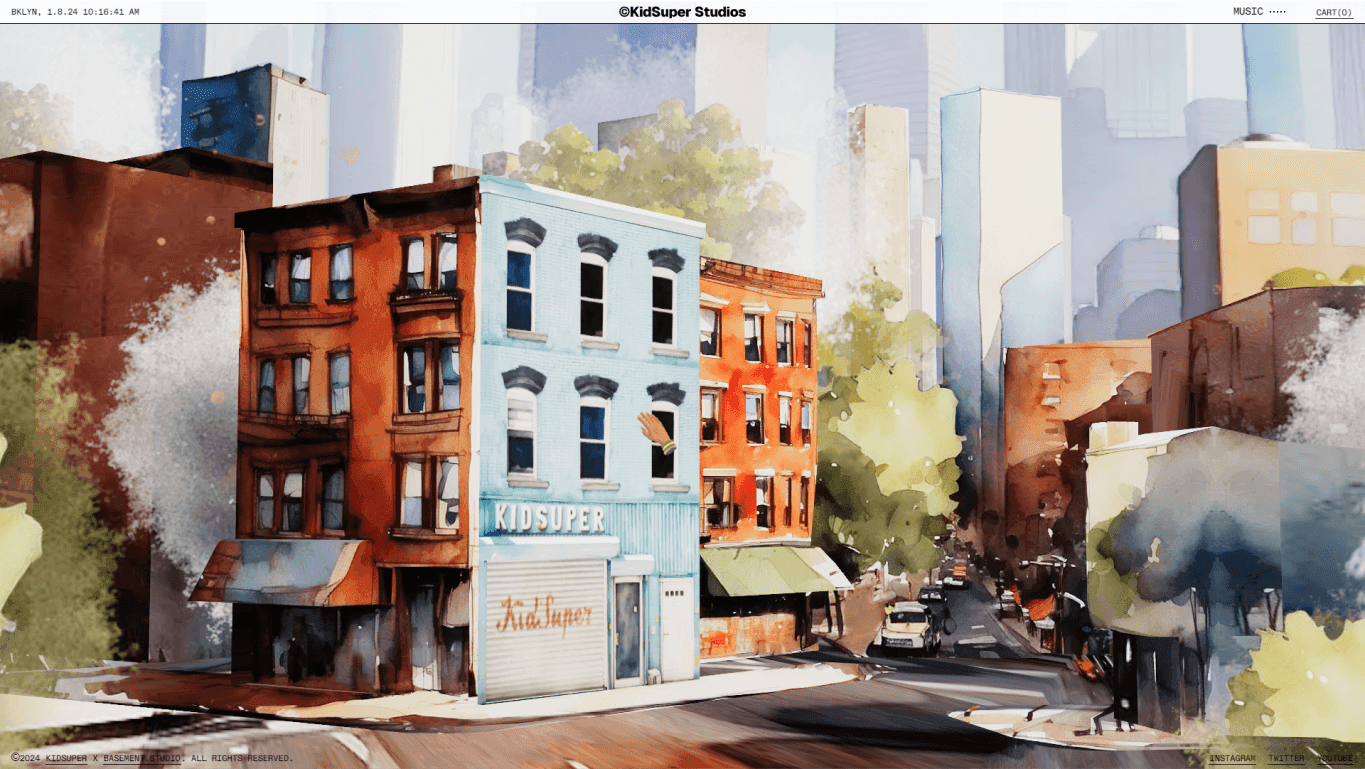
These images are mixed using a mask that the user can draw in real-time; we just draw a circle into the revealed texture following the user's mouse position.
Note
Notice that the reveal mask has a low resolution to improve performance. We added an offset to the reveal mask using a "paint" texture to fix this.
To complete the effect, we need to add a canvas normal map on top of the final render.
Performance Hint: Disabling The Effect
Constantly drawing in a canvas consumes resources, so once the reveal effect is finished, we turn off the entire calculation at once. To achieve this, we first created a boolean uniform, renderReveal, used in a function called getReveal that returns the result of mixing the two images based on the drawMap.
1// UV coordinates
2varying vec2 vUv;
3// The render of the scene
4uniform sampler2D tDiffuse;
5//The map drawed by the user
6uniform sampler2D drawMap;
7// A texture of painting to offset the drawMap
8uniform sampler2D brushTexture;
9// Whether to calculate or skip the reveal effect
10uniform bool renderReveal;
11
12struct Reveal {
13  vec3 color;
14  float factor;
15};
16
17Reveal getReveal() {
18  vec3 color = texture2D(tDiffuse, vUv).rgb;
19  if (!renderReveal) {
20    // skip the entire reveal calculation
21    return Reveal(color, 1.0);
22  }
23  // ... Real mask calculation
24}
Animated Paintings With WebGL
One of the key features of this experience was the possibility of diving into animated paintings. This was, at first, simple. We’d just use different scenes and render them with multiple cameras, then use the rendered textures in materials to “place them” on the studio walls.
Thankfully, the awesome people of pmndrs created pmndrs/drei a huge package full of utilities for ThreeJS. This library features a RenderTexture component, a handy helper that enables you to transform a live scene into a texture, which can then be applied directly to a material.
Because of the nature of this project, we had multiple render textures that quickly became expensive to the GPU. That is why we had to create our own version of the RenderTexture component, allowing us to pause the render and do other things like passing custom render targets as a prop. Let’s see.
Creating Our Own RenderTexture Component
This component was heavily based on Drei’s RenderTexture (check its source). But, in our case, we needed some extra features:
Allow us to pause the render
If the render target size changes, re-render one frame.
It should provide some context to know if it’s rendering
Let us pass custom render targets
This is an example of usage:
1const HudRenderer = () => {
2  const [isActive, setIsActive] = useState(true)
3  const size = useThree((state) => state.size)
4
5  // This render target will be automatically resized by RenderTexture
6  const hudRenderTarget = useMemo(() => new WebGLRenderTarget(10, 10), [])
7  // scene to use as a container
8  const hudScene = useMemo(() => new Scene(), [])
9
10  return (
11    <RenderTexture
12      // size of the render target
13      width={size.width}
14      height={size.height}
15      // should continue to render this scene
16      isPlaying={isActive}
17      // render target to write to
18      fbo={hudRenderTarget}
19      // scene to use as container
20      containerScene={hudScene}
21      // If you want to use the same pointer as the main canvas
22      useGlobalPointer
23    >
24      <HUDScene />
25      <PerspectiveCamera makeDefault position={[0, 0, 3]} />
26    </RenderTexture>
27  )
28}
We can then use hudRenderTarget.texture to get the rendered scene.
The component provides some context data, which we use to pause animations. We also created a custom hook called useTextureFrame, which is similar to useFrame but only executes when the render texture is playing, letting us pause computations.
Note
Is this component open-source? We still need to clean the code and search for possible bugs; follow us on x.com so you get notified when it's released!
Navigating Through Portals
Another key to making this world immersive is the portal navigation to travel through scenes. You can access the store and then go back to the outdoors smoothly, like spiraling into an infinite loop animation.
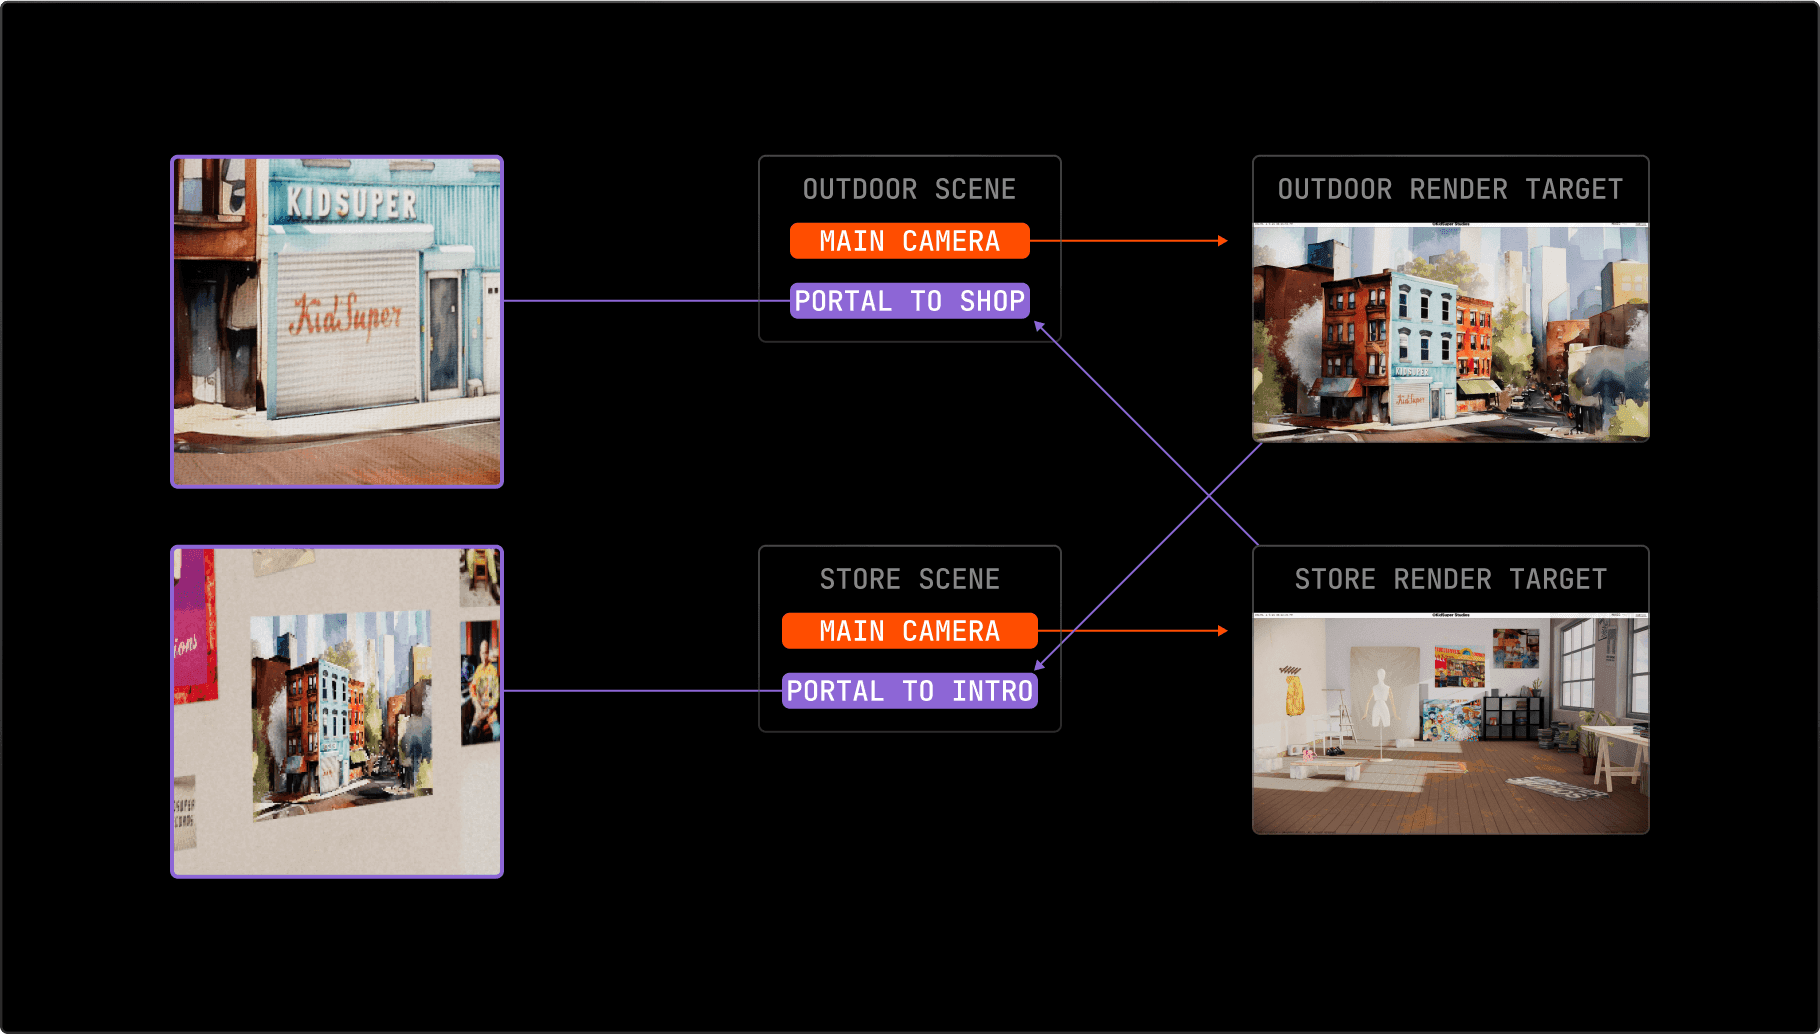
To tackle this challenge, we used a technique similar to the one on the custom RenderTexture, but this time, a global renderer will mix the scenes. We start off by rendering each scene into a render target:
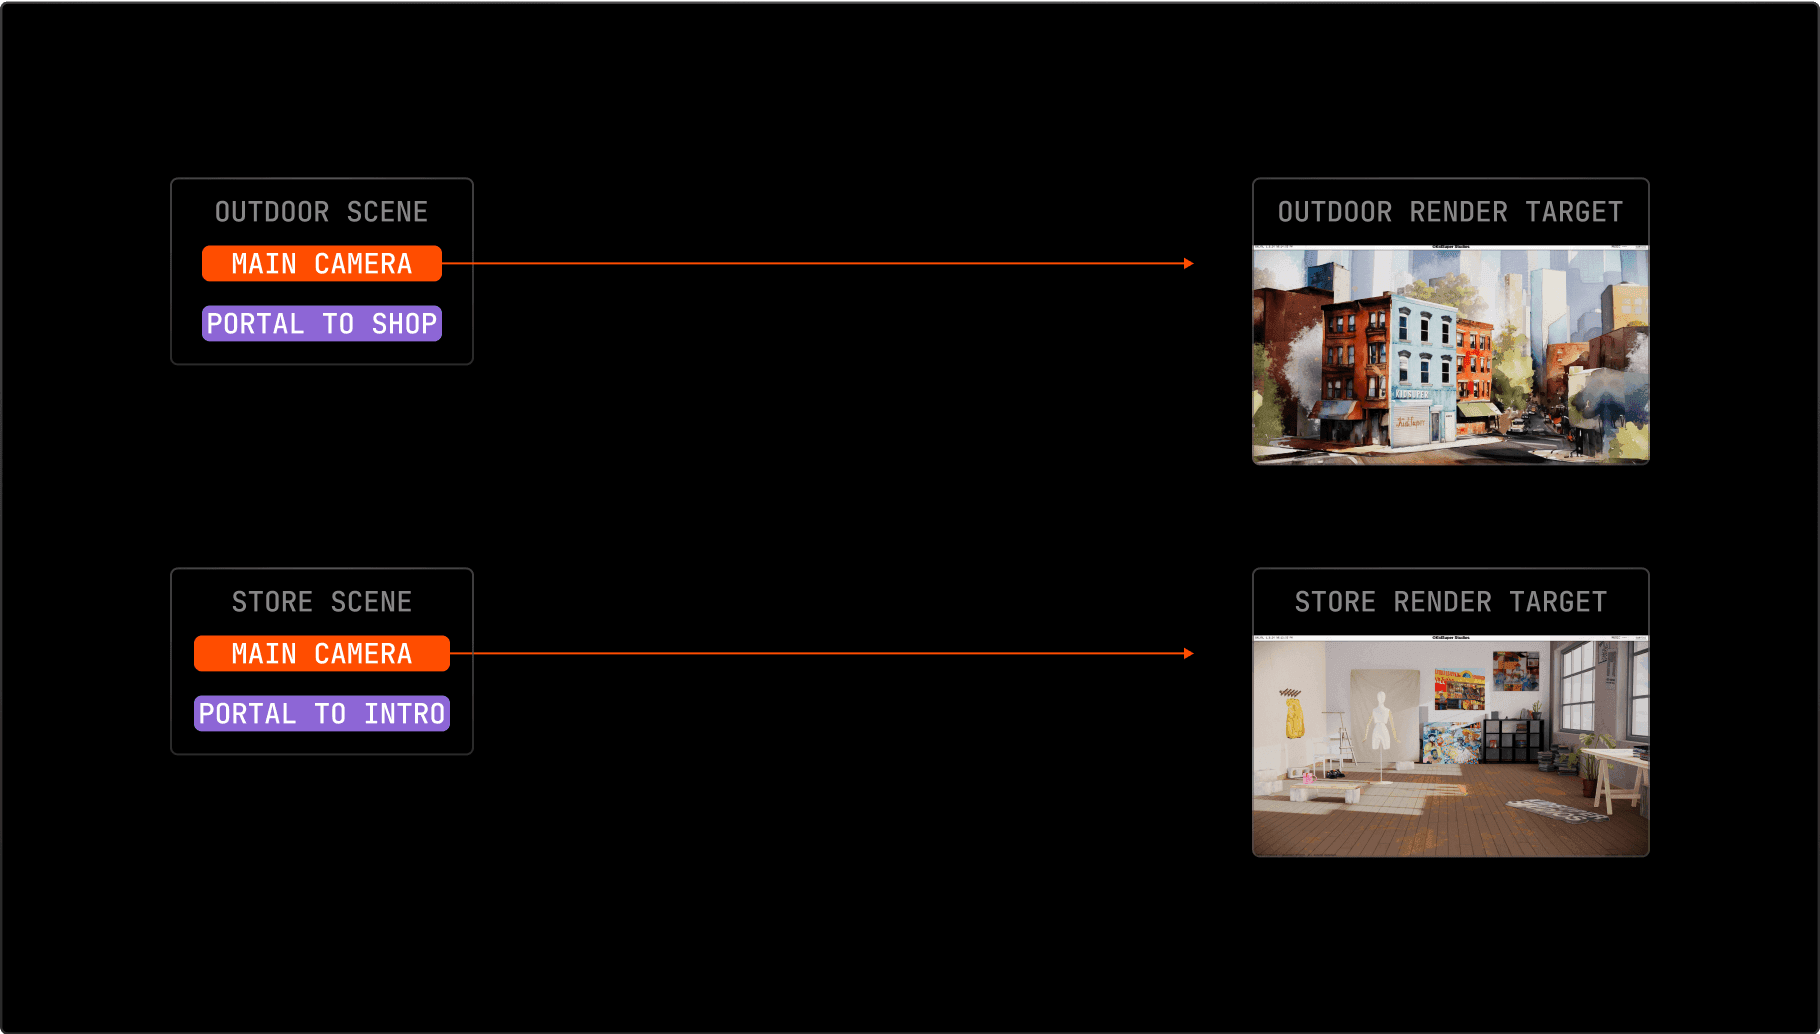
Then, the result of each render target is used as a map for the portal object.
Finally, a global composer decides which texture should be rendered into the screen and adds postprocessing.
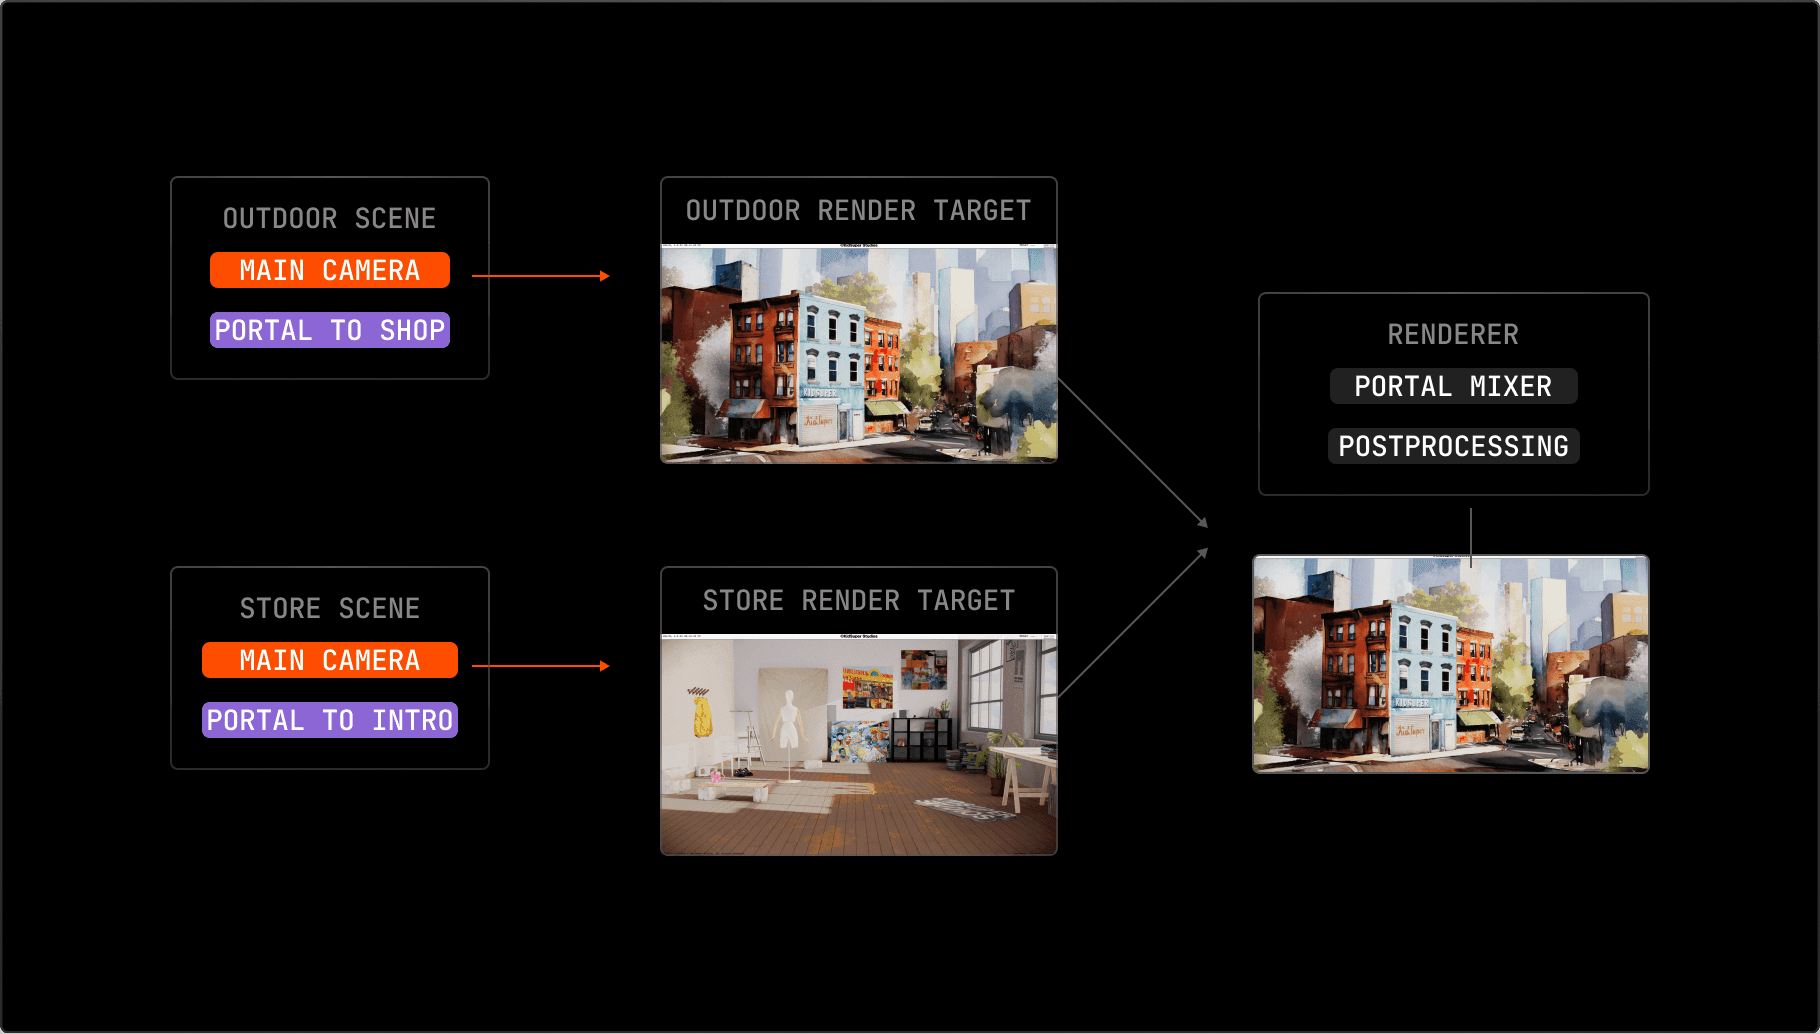
When you click on a portal, the camera is moved in front of the portal mesh, aligning perfectly so there is no “jump” when transitioning into scenes.
A Shareable WebGL Sketch With Vercel Blob and Vercel KV
Among some fun easter eggs, you can open a notebook in the store's bookshelf to create your own artwork by sketching on the screen. The best part? You can share it on Twitter, as we saved the original painting directly to the URL.
To begin with, we crafted a compact drawing tool using pmndrs/meshline library. This lib allows us to create lines by connecting points we got through raycasting the mouse movement over the surface of the drawing canvas and using his UV to calculate the position of each point in this space. After completing your artwork and clicking on the "share" button, we capture a still frame from the isolated render of the notebook and save it in Vercel Blob storage via a route handler, which returns the URL to be able to access our blob later.
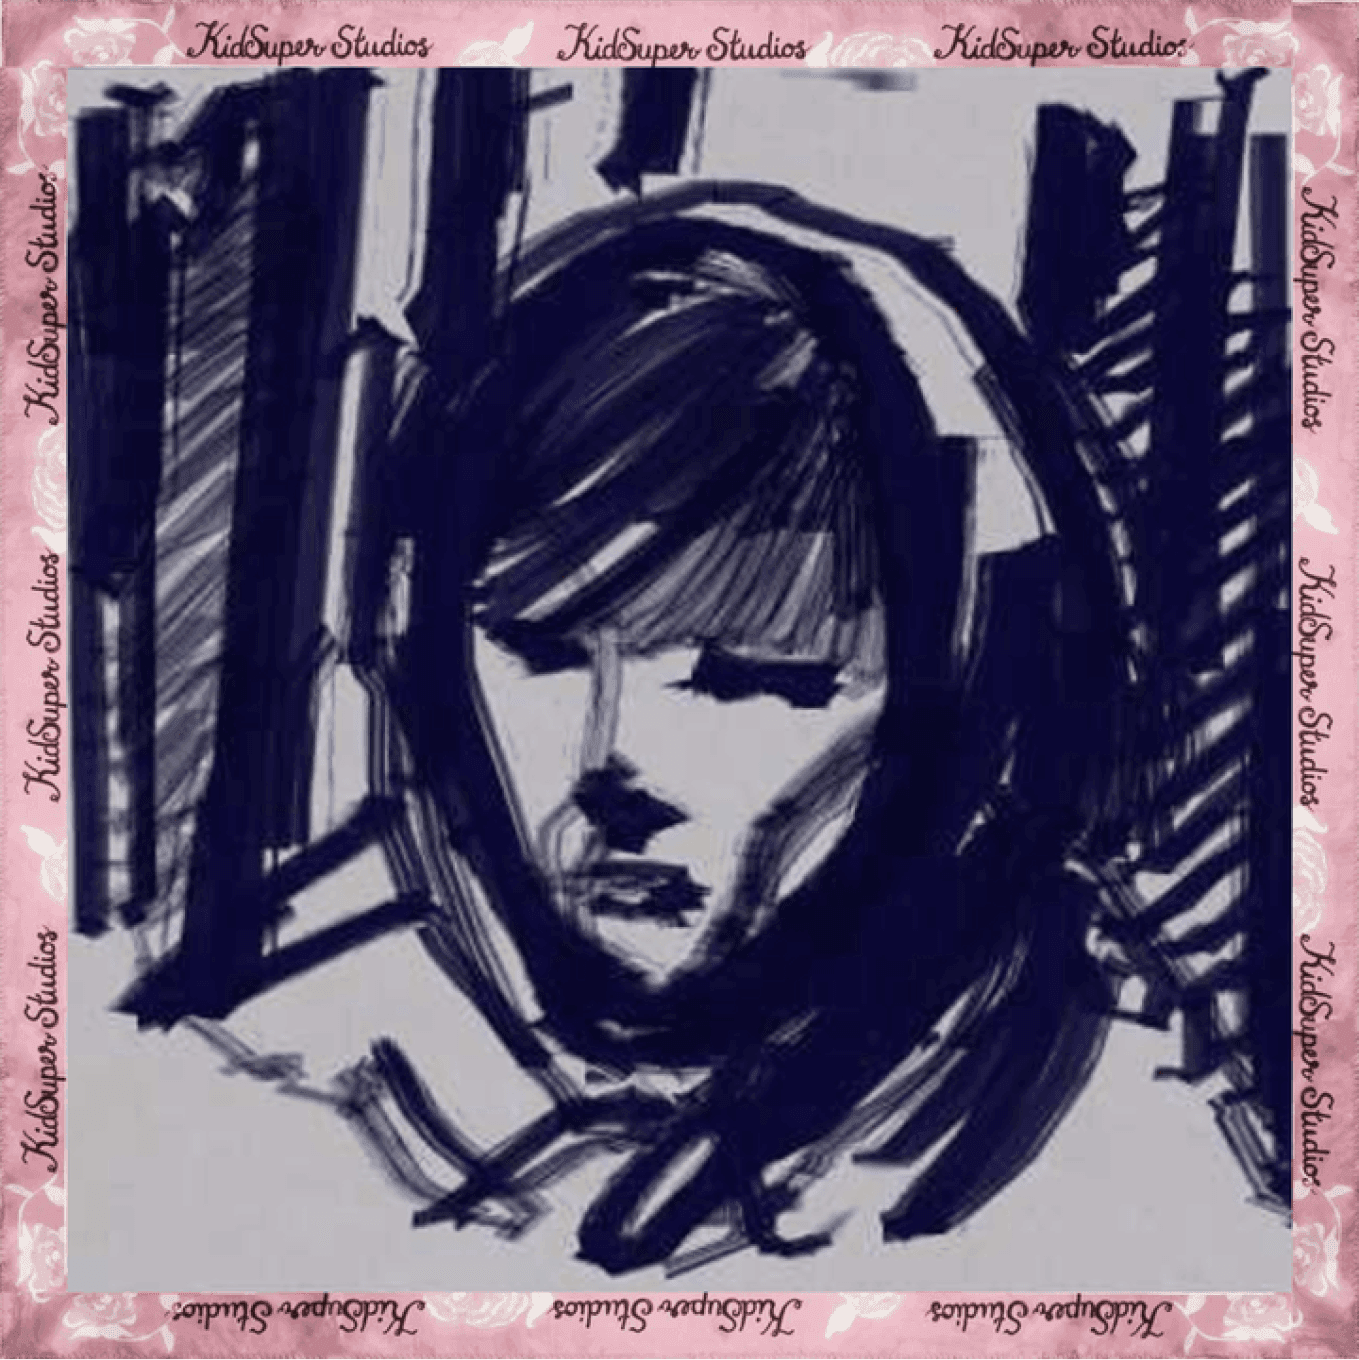
Then, another route handler, using Sharp, takes care of the cropping, optimization, and accessories of the render frame we saved in our storage and gives the correct format to be used as an OG image. The tricky part involves preserving the actual data for retrieval when someone accesses the URL. We addressed this by storing the matrix of points' state via Vercel KV (a serverless Redis storage) and linking it with the Blob URL as a key.
This way, we allow users to create their own experiences, similar to the phenomenon we generated with the paint app in the Wilbur Soot store.
Final Words
Having space for innovation is key to expanding capabilities and going the extra mile. We're stoked about this collab: this project let us wrap up 2023 with a bunch of cool experiments, and we're kicking off the new year super excited about all the creative possibilities we’re unlocking on the web. So, stay in the loop, follow us on x.com, and don't miss the chance to turn up the music player and check out all the nifty features we crafted at https://kidsuper.world.


