New HQ, new site, same basement. From PS2 aesthetics and custom shaders to instanced meshes and light-maps — here’s how we turned our home into a performant & interactive playground on the web.
2024 was a year of remarkable achievements. We launched KidSuper World — an astonishing 3D e-commerce experience, we won a webby for that. We pushed the boundaries of interactivity and multiplayer experience with the latest Next.js Conf site. We crafted a beautiful commerce for Daylight Computer. and we also partnered with Cursor AI — the largest AI-integrated code editor on the internet nowadays.
Btw our most ambitious project of 2024 was, in fact, building our brand new studio — a 500m² space just steps from the sea in Mar del Plata, Argentina, the city where we were born.

A big milestone for basement—one that got us thinking: how can we share this moment with the rest of the world in a way that feels just right?

As we looked ahead to 2025, one of our key goals was to redesign our website into an extensible playground for experimentation — a place to test new technologies and creative boundaries.
So, new office? New site? The cards were already on the table.
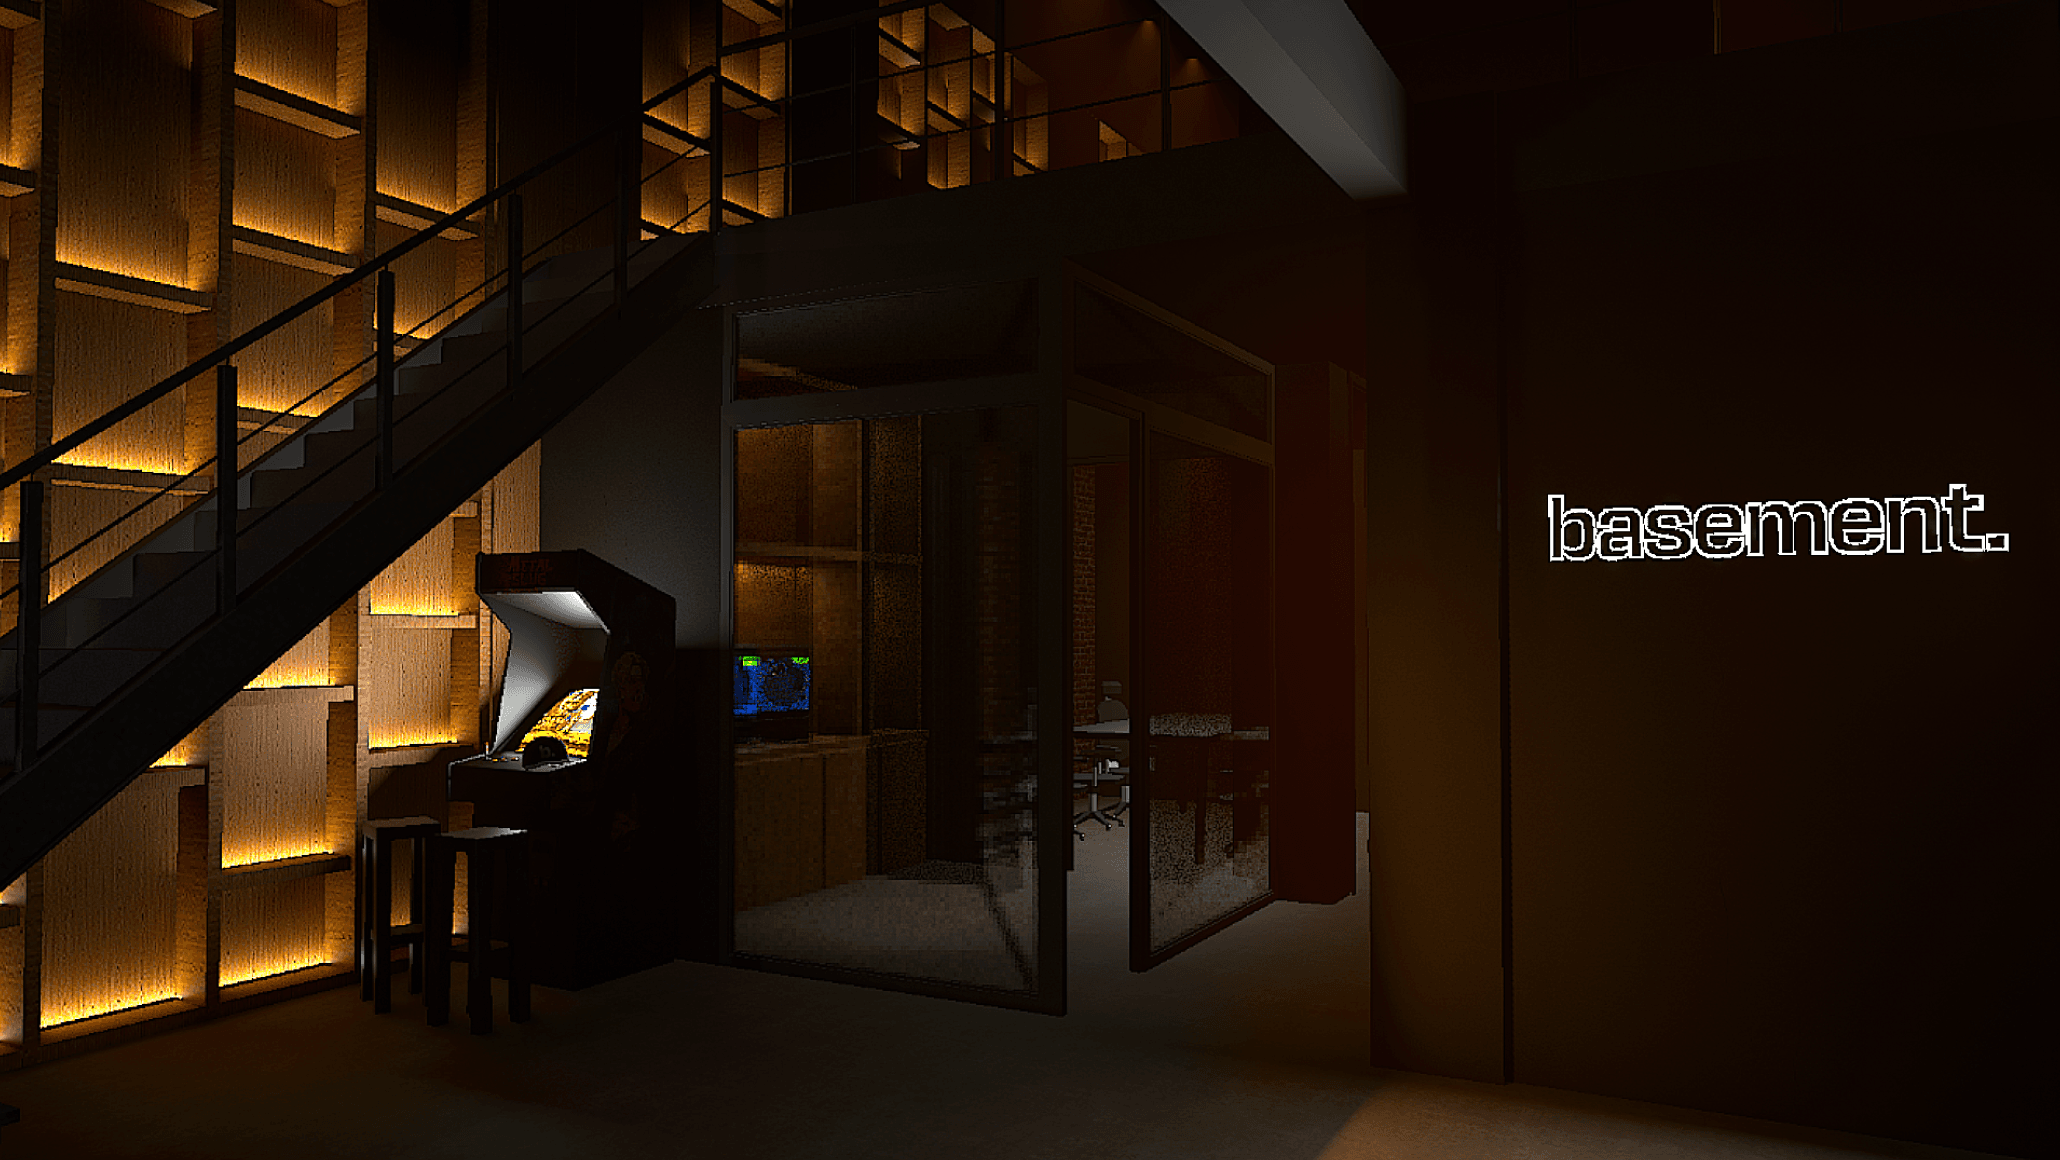
Nostalgic aesthetics
The idea was simple: we wanted to recreate our office in 3D, but make sure it works very smoothly. As we kept tweaking the look, one version stood out fast — the PS2 style.
It hit the sweet spot — it brought back all the nostalgia from the games we grew up with, and those old-school limitations actually helped us keep things lightweight and fast on the web.
The constraints
Rendering an entire office in high-res 3D would’ve been heavy, especially for the web. Low-poly assets, compressed textures, and those old-school visual tricks made it way easier to keep things fast and lightweight. Still, we wanted to stay true to the aesthetic, so we asked ourselves: what pixel ratio feels authentic? How low can we go with textures? How many polygons are too many? Should we add dithering—and if so, where? These questions guided how we brought the whole thing to life, this was 100% experimental, error-proof.
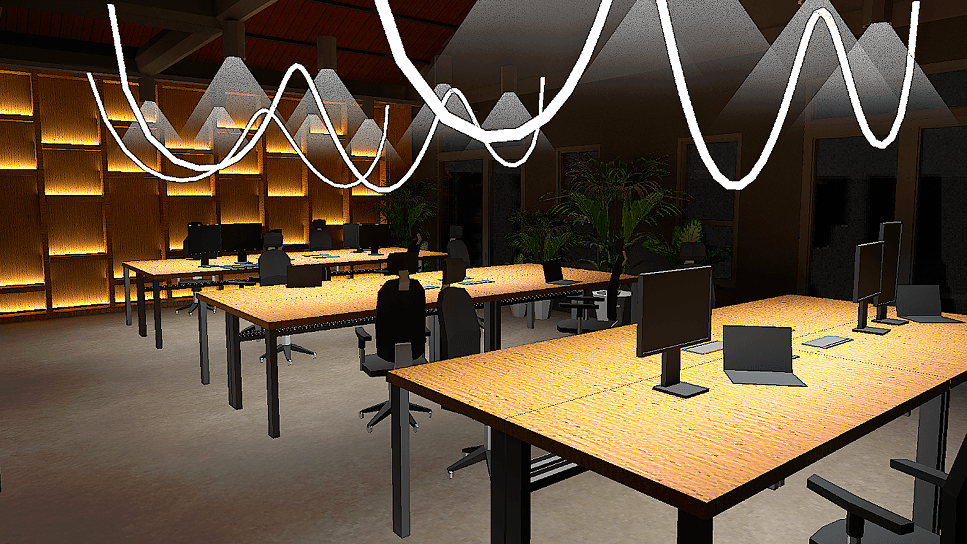
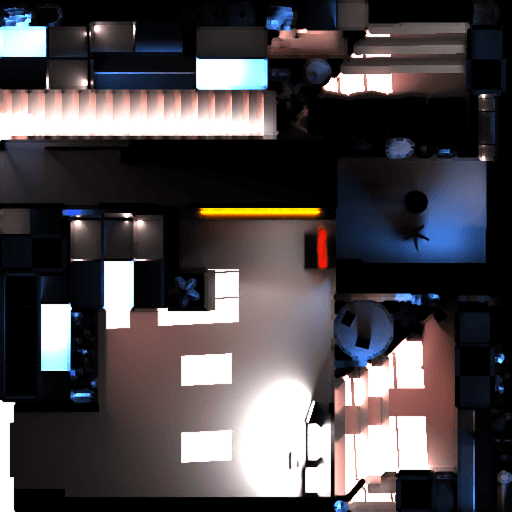
When it came to lighting, we pivoted between ray-traced and flat plane textures with no lighting at all.
We realized that we liked the smooth lighting from the realistic render, but we wanted it to perform as efficiently as possible. So we implemented light-maps.
Light-maps bake lighting information into static textures, enabling realistic effects without requiring real-time calculations. A similar concept applies to ambient occlusion, which calculates how exposed each point in a scene is to ambient lighting, resulting in natural shadowing.
Before and after the same scene when applying light-maps & ambient occlusion, looks like magic, right?


Even though the image above has realistic lighting, it is nothing more than textures:
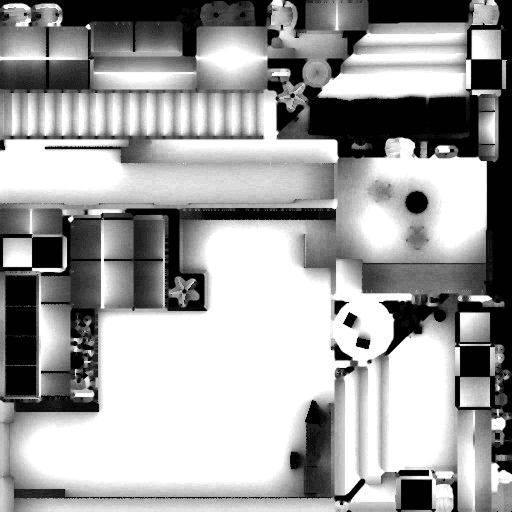
Light-map and ambient occlusion textures for the same group of objects
To optimize rendering even further, we decided to create our own shader material that renders textures, reflections, and light-maps in an efficient & aesthetic way. Actually, it was used by nearly every element in the scene. This was key to keeping the whole experience having a consistent look and feel.
Navigating the 3D office
Our first idea was to divide the office into sectors and link each one to a page.
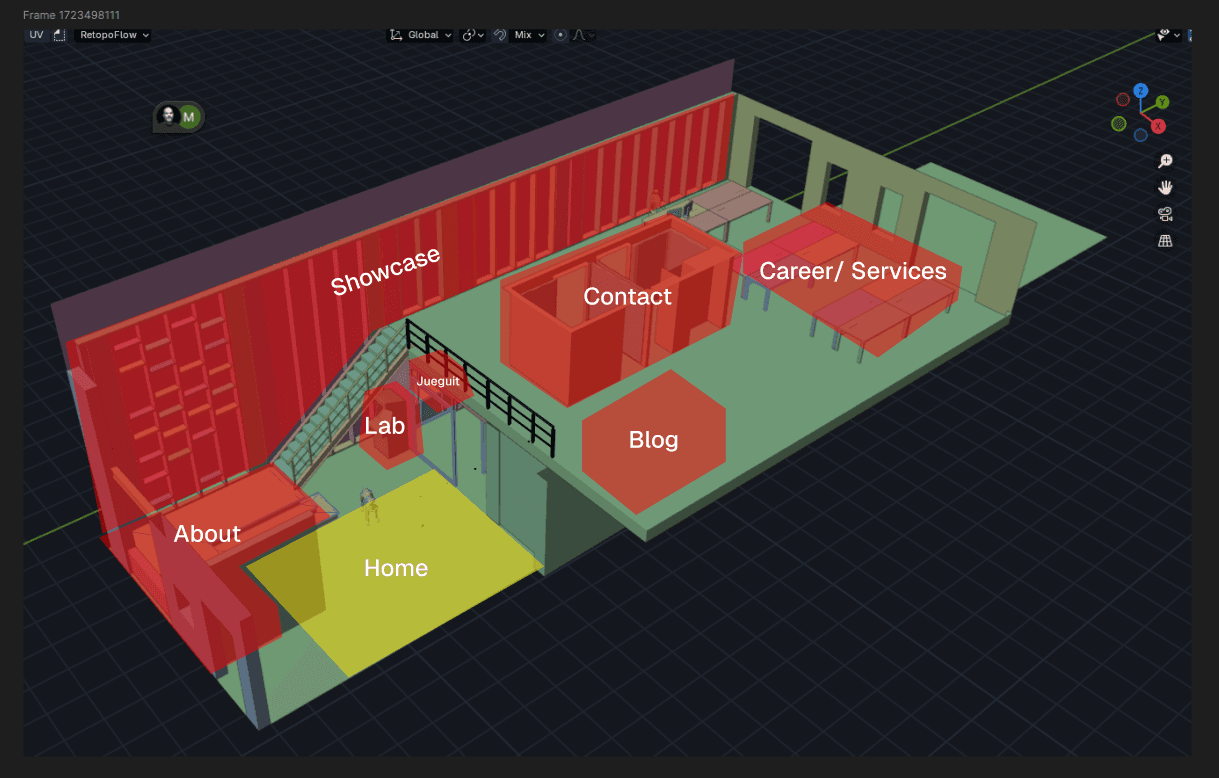
During testing, opening a menu to change sections felt too slow. So we asked ourselves — why not let users simply click through the 3D environment instead? Yes, like classic point and click adventure games.
Putting ourselves into the scene
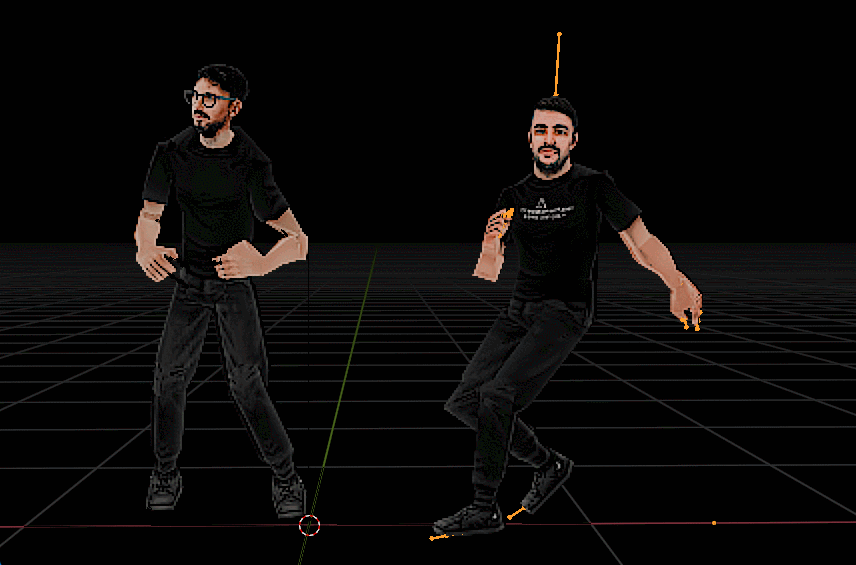
We had a problem — our office has people in it, and we wanted to capture that. So we started thinking: how could we include ourselves?
We ended up scanning our faces to generate textures and models.
To reduce loading time as much as possible, we combined all the faces into a single mesh and used morph targets to toggle between individuals.
To optimize the rendering, we needed instanced meshes. However, since Three.js doesn’t support instanced skinned meshes, we had to build our own implementation.
Inspecting everything
We were looking for a way to incorporate references to our culture, projects, and passions. We concluded that the best approach was to scatter inspectable objects throughout the site.

Each inspectable object is configured in BaseHub, and has different properties. Having objects scattered around the office makes the space feel more alive.
Of course, no retro vibe is complete without the right ambient music. We did our homework—and one of our developers actually composed all the tracks you hear in the office from scratch. You can check them out on the X below.
yesss! soundcloud.com/basementdotstu… done by @bewaretherat
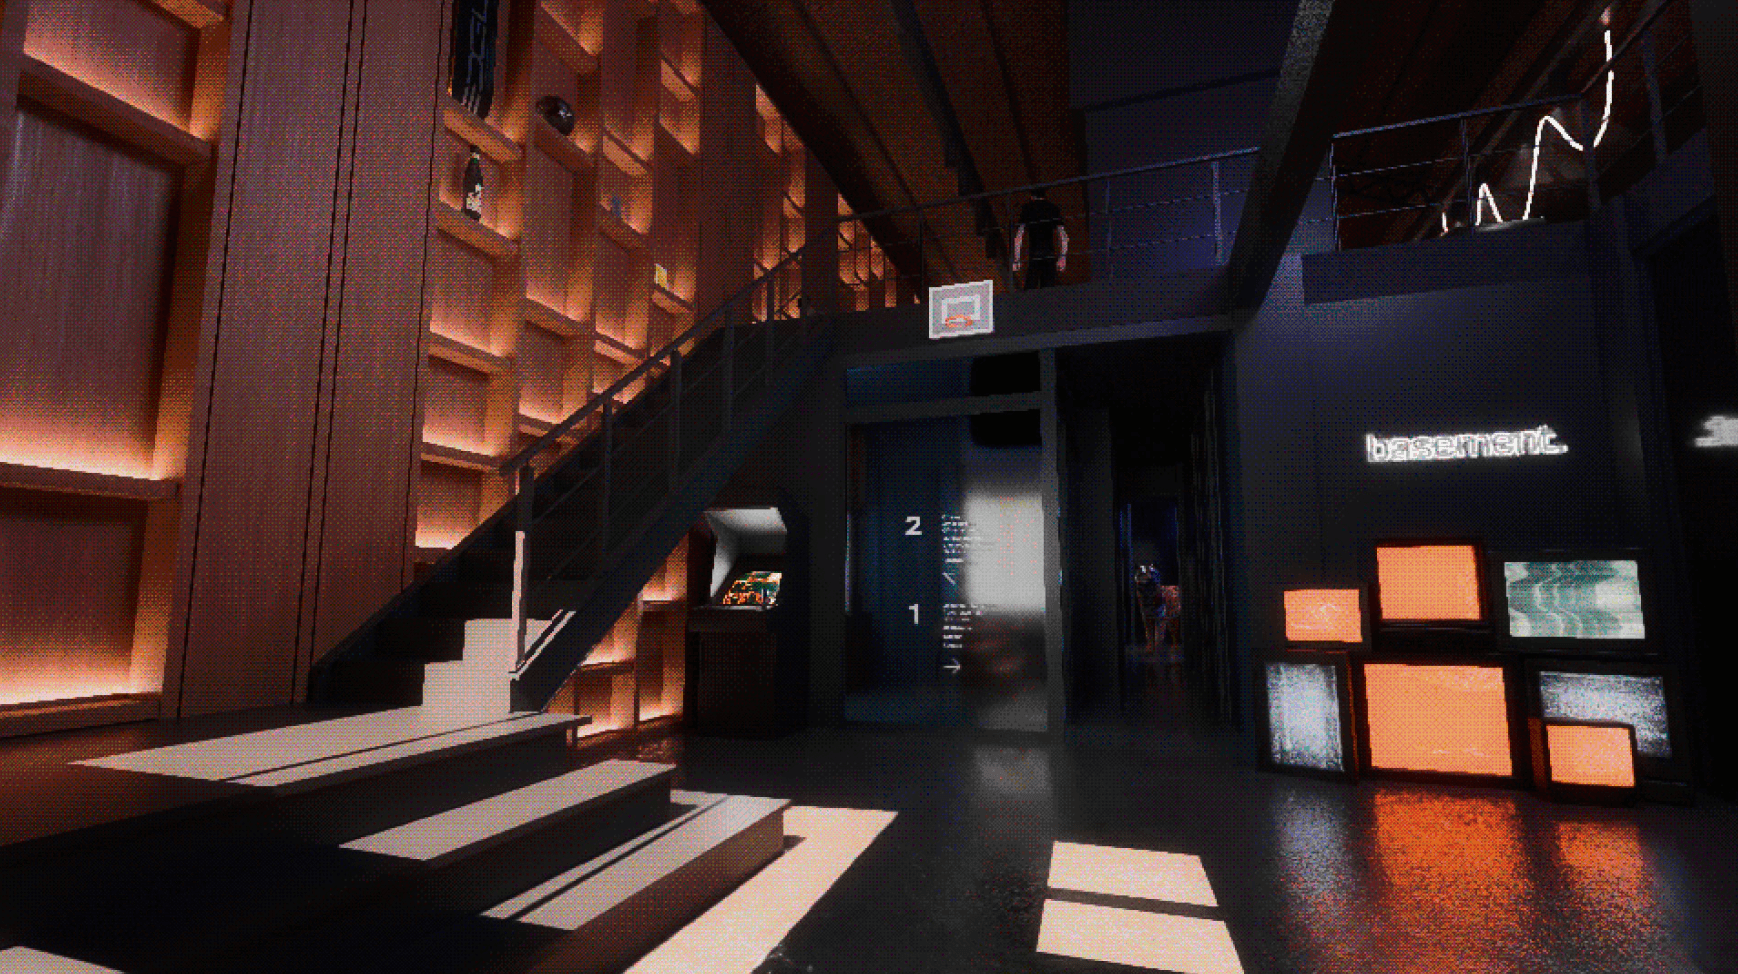
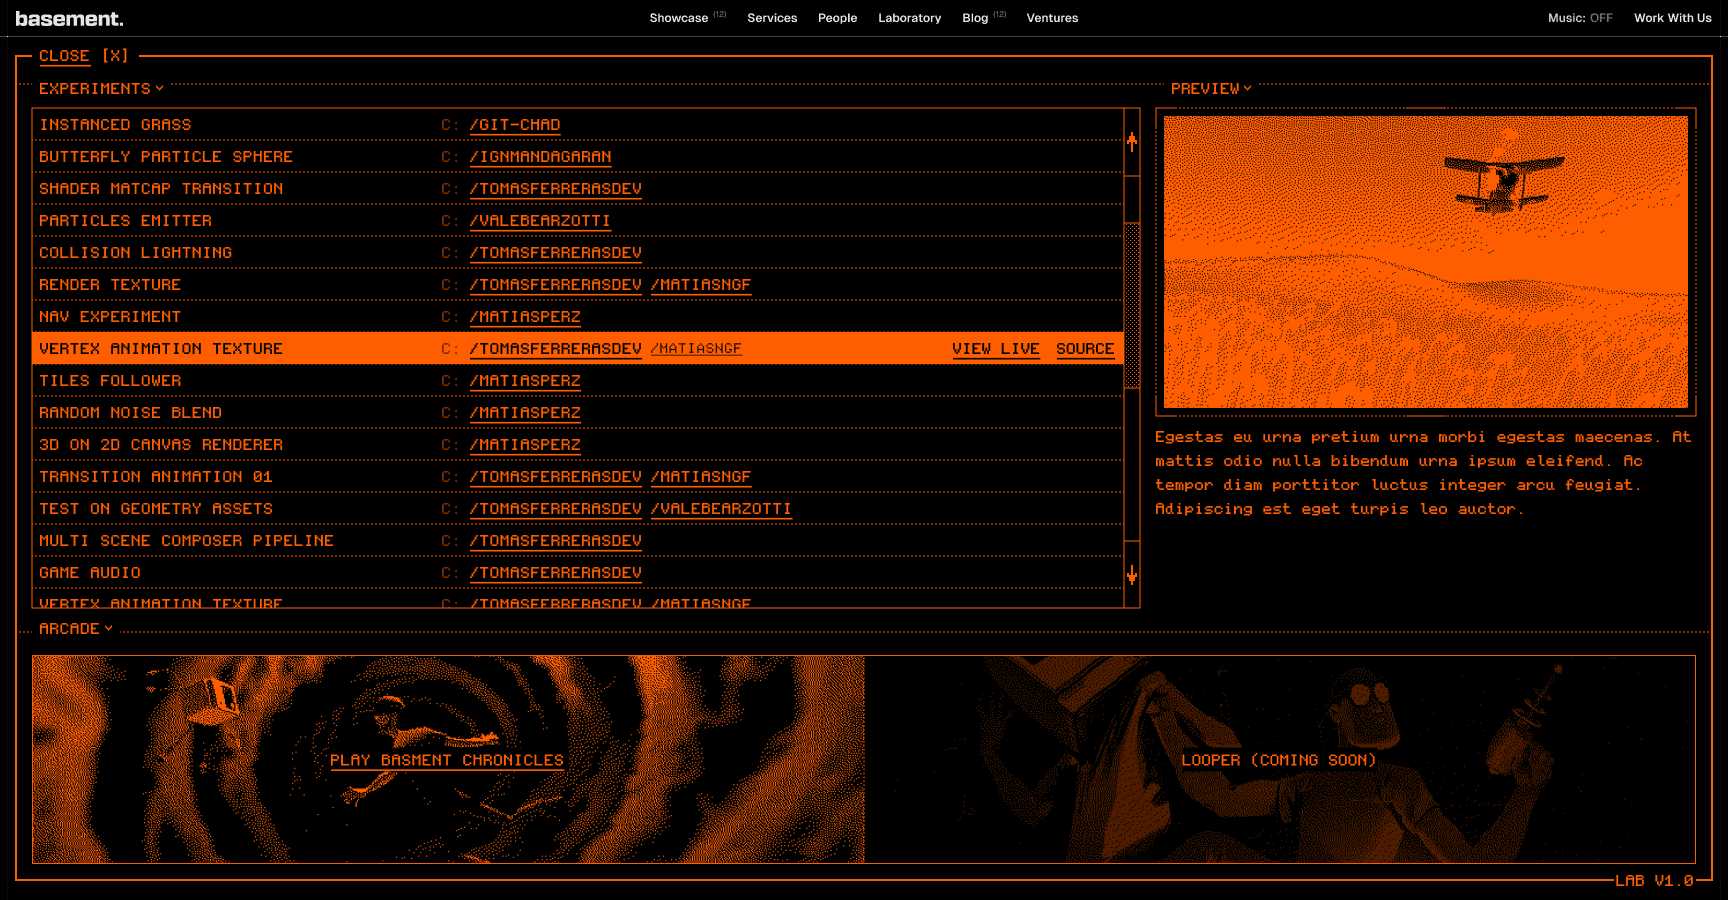
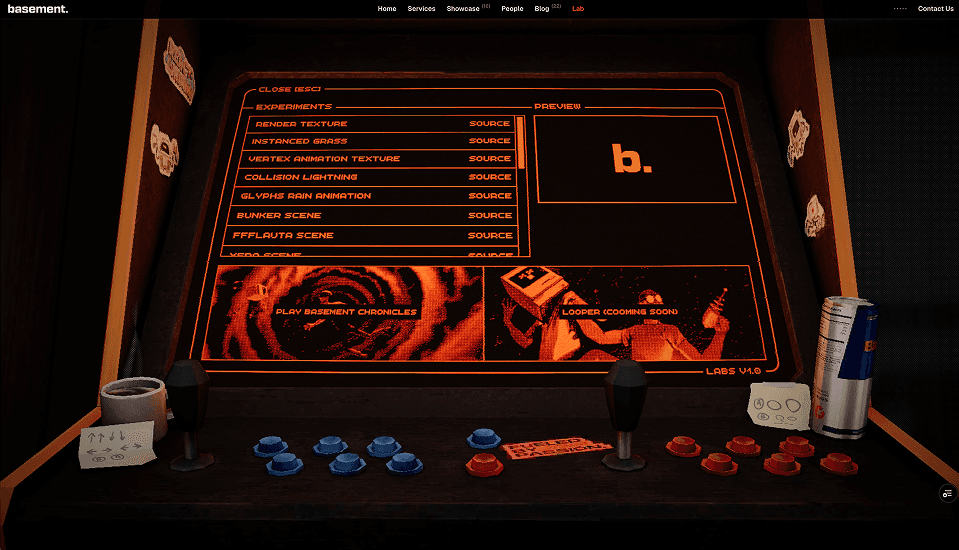
The Lab
We wanted to showcase all of our experiments in a different way — not just as case studies or blog posts, but as playful, standalone experiences. That’s how the idea of the arcade was born: a space to archive our prototypes, tools, and internal experiments in a format that feels more like a game than a gallery.

The color was inspired by those old amber screens and interface was something like a weird mix of MS-DOS and MSX Basic.
The workflow
Storing our assets
We use BaseHub as a CMS — not just for the content itself, but also to manage everything related to our 3D scene, thanks to its versatile data structure capabilities.
Every 3D model, every camera setup, and every special sound effect lives in the CMS — nothing is kept in the code repository.
While the developers focused solely on solving technical implementation challenges, the 3D artists were able to iterate on the models as many times as needed, directly in the browser and in real-time, without involving development. It really felt magical.
From a development standpoint, we saw ourselves as a sort of DevOps team for our artists — responsible for providing the tools and functionality that empowered them to work directly in the browser, giving them the freedom to iterate independently.
As we refined our workflow, we began to notice repetitive tasks and specific needs when preparing 3D models for web implementation. To optimize the process, we developed a series of custom tools with help from Cursor.
These tools allow us to eliminate unnecessary attributes, clean up materials, generate UVs, and even retrieve the exact position of a point in coordinates compatible with Three.js. All of this saves time and gives us greater control over the models we bring to the web.
One more thing, performance.
KTX
To optimize the site as much as possible, we compressed the 3D textures using the KTX format with the gltf-transform CLI tool. This compression, particularly with ETC1S mode, allowed us to significantly reduce file sizes without compromising much on visual quality. By the way, thanks to @dghez_ for generously sharing his knowledge on this technology — it helped us go deeper and optimize smarter.
Offscreen
We didn’t want the main thread to choke during load, so we created a separate canvas to render the office as a wireframe while the main experience loads.
On the other hand, we wanted to use a 3D model that could appear at any point on the screen and act as a contact us form, so we used a separate canvas as an overlay. We moved the rendering to an offscreen canvas to avoid compromising the main thread. It all adds up to a dual-layered experience that blends immersive 3D with structured 2D content.
We’ll leave it here for now — but this is just the start. Up next, we’ll go technical into the hidden layers — the tricks, hacks, and workarounds that made it all possible, stay tuned.